Saturday, July 30, 2011

homemade vanilla ice cream topped with sugar-glazed strawberries... and sprinkles

I'm not a very festive person. I suppose I am with Christmas, but anything else seems not worth my while. Perhaps it's that I'm too lazy {we'll say "likely"}. Perhaps it's just that I get overwhelmed by the pomp of it all. Or perhaps it's the fact that I feel crafts, etc, must be practical to be worth their weight. Either way, we don't do much for holidays.

But this Independence Day we went all out.... and made the above treat. :) I know. Somebody contain the festivities. Homemade vanilla ice cream topped with sugar-glazed strawberries topped with {at my 4-yr-old's request and in attempt to be a bit more festive} pretty blue sprinkles. It was pretty tasty, although I think I prefer the dish sprinkle-less. Pretty, though, no?

A few pre-prep instructions:
1) This recipe uses an automatic ice cream maker {ours is Cuisinart, and we love it- thanks K&B!!}. You'll need one to do it our way.
2) Make sure your freezer bowl {part of the ice cream maker} is totally frozen; I believe the manufacturer suggests freezing it for 24 hrs ahead of time {just checked; it's 6-22hrs... how's that for vague?}. Your creamy mix won't freeze otherwise. Though ice cream soup doesn't sound entirely bad...
And 3) Prepare the strawberries before you start on the ice cream. They need the full time to sit in the sugar if they're to be syrupy and delicious. They'd be fine otherwise, but trust me; they're better this way.
Okay, that's it! Now get crackin! Your taste buds will thank you!


RECIPE: Sugar-glazed Strawberries

Ingredients:
strawberries
sugar

Directions:
Slice/dice the strawberries. Sprinkle liberally (some might say "dump") with sugar (maybe 1/4 c. sugar for a reg-sized carton of strawberries?). Mix well. Refrigerate for a while (20 min-ish minimum). The sugar draws out the juices, and together it makes for some fantastic, sweet, syrupy strawberries to go on top!

RECIPE: Homemade Vanilla Ice Cream

Ingredients:
2 c. milk (2% or whole)
2 c. whipping cream
3/4 c. granulated sugar
2 tsp. vanilla extract (the good stuff, if you've got it)

Directions:
Put all above ingredients in the blender. Blend well until sugar is dissolved. (This can also be done with a whisk and in a medium bowl, but the blender produces slightly better results.) Turn on the ice cream maker, making sure the stirring part is in already and the lid is on. Pour mixture into freezer bowl through ingredient spout and let the machine work its magic! You'll know it's done when the ice cream resembles ... well, ice cream ... and is nice and thick (about 25-30 min).


Dish up the delicious ice cream immediately (it is super soft-serve and will melt quickly) and top with the pre-prepared strawberries! Then add some blue sprinkles if you're feeling particularly American that day. :) Enjoy. It's yum.

Wednesday, July 27, 2011

chicken nuggets... with yogurt and strawberries

No, not together. :) Separate, preferably in their own little compartments in an adorable little kiddie dish. No recipe needed. Just bake chicken nuggets according to package instructions, add a dollop of yogurt and a few fresh strawberries, and BAM! Dinner is served! Happy children, happy mom. :) Can't argue with that.

Sunday, May 15, 2011

mom's award-winning country white potato bread

My mom always made excellent bread. (I call it "Award-Winning" because it won blue ribbon in the county fair!) She also made it often. Many a Sunday afternoon, we would be welcomed home from church with a savory bowl of beans and some delicious homemade bread. Mmm! I won't say we took this homemade bliss for granted, as I remember quite enjoying it every single time. But being a mother, I now realize just how much effort my mom put into feeding us, among other things. There's nothing quite as effective as parenting to make you appreciate your parents! :) Anyway, my mom recently moved up here, and I got her to teach me how to bake bread (the simplest thing, but among the most intimidating for me). Her recipe is pretty easy. Really. And the bread really is fantastic! It holds together really well, is the perfect density (you know what I mean), and tastes divine! I plan to make it again soon. And again. And again. And again...


RECIPE: Mom's Award-Winning Country White Potato Bread

*Note: This recipe times THREE made two large loaves and four mini-loaves. I believe once over it should just make one loaf. Not super sure. I'll ask. The above photo is of the mini-loaves. And yes, my photography skills are severely lacking...

Ingredients:
3 c. flour
2. Tbsp. sugar
2 tsp. salt
1/2 c. (or more) instant mashed potato flakes
1 egg
2 Tbsp. butter-flavored Crisco (eyeball it)
2 tsp. yeast
1 1/2 c. warm milk (can also use dry milk, just reconstitute it to make this much), less on a rainy day

Directions:
Combine ingredients in a large bowl, adding milk a little at a time (you may need more/less). Beat/knead (beat with bread hook) until well mixed and dough is slightly sticky but still pulls away from you. Put the dough in a pretty ball and place in a new, butter-greased bowl. Cover with plastic wrap and towel and let rise until doubled in size (1 hr ish). Then punch it down, re-knead, shape, and place in butter-greased bread pans. Cover again with towel. Let rise (again- until good lookin' - another hr?). Bake @ 350F for 30 min. or until desired color is reached.

Sunday, January 16, 2011

egg, ham and cheese bagel-wich

Last week should be dubbed The Week of the Bagel-wich. My kids and I dined one night at my friend Li's, and she served... bagel-wich. The following day, my next-door-neighbor and friend Aubrey brought us dinner... bagel-wich. The coincidences were undeniable. The stars aligned. We NEVER made these at our house, but how could we deny fate? :) We've now made them ourselves- a couple of times {since last week - lol}. The idea is certainly not my own, but here is our rendition.


RECIPE: Egg, Ham and Cheese Bagel-wich

Ingredients:
plain bagels {Sara Lee's are scrumptious}
ham, thickly sliced
sharp cheddar cheese, sliced
eggs
salt/pepper to taste

Directions:
On a hot griddle, sear the ham slices. Place the ham on your bagel bottom. Place a layer of cheddar on top of these. Nuke the stack for about a minute, or until the cheese melts. Meanwhile, fry up the egg like you like it- also on a hot griddle, seasoning with salt/pepper. Place the egg on top of the bagel-ham-cheese stack, then top with the corresponding bagel piece. Serve warm. Devour. And Mmm... love it!

bananas foster

I first had Bananas Foster at a Relief Society activity. The recipe was my friend Belinda's. I swear I wrote the recipe down somewhere, but when I searched for it this morning, it was nowhere to be found. I searched online, but none of the recipes sounded right. So I improvised. And it. Was. Delish.

If you've never tried Bananas Foster on waffles, you're in for a treat! Seriously, who knew waffles could be so rich and amazing? Give it a try. You'll be glad you did.

RECIPE: Bananas Foster

Ingredients:
1/2 c. butter, cubed
1/2 c. packed brown sugar
3 bananas, sliced
vanilla extract
rum extract
cinnamon
nutmeg

Directions:
In a frying pan over med-high heat, melt butter. Add brown sugar and stir to dissolve. Bring mixture to a bubble. Add a sprinkling of cinnamon and a dash of nutmeg. Continue to bubble for 2ish minutes. Add sliced bananas, stirring to coat. Add a tiny splash of vanilla, followed by 4ish drops of rum extract. Stir to combine. Continue to bubble and stir for a minute then remove from heat.

Serve warm over waffles, ice cream, or whatever suites your fancy. Top with whipped cream or Cool Whip if desired, adding nuts for crunch and/or sprinkling with more cinnamon for aesthetics. Eat up and enjoy!

Sunday, October 31, 2010

dinner in a pumpkin


Every fall, our little family has dinner in a pumpkin. It's a tradition and became one without real intent, which is pretty cool- as our family is young, and traditions are mostly ideas we have. This meal is so, so yummy (if I do say so myself) and very cozy. Something about it feels like comfort food to me. Maybe it's just the fact that my whole family is gathered around a table, eating warm and wonderful food- while outside, the world is wet and cold. Or maybe it's just some awesome grub! :) Either way, we love it. A lot.

I got the idea and original recipe from my friend, Brittney. This version is pretty much hers, with a few twists. Hers is really great, but I quite liked my version, too. It turned out great. I think we'll be having dinner in a pumpkin AGAIN this year! {The audacity, I know!}


RECIPE: Dinner in a Pumpkin

Ingredients:
1 medium pumpkin*
1 lb. ground beef
1 large onion, diced
4 garlic cloves, minced
1 c. celery, sliced
1 bell pepper, seeded and diced
2 c. cooked rice
2 Tbsp. soy sauce (or to taste)
salt/pepper, to taste

{*Note: Choose a smaller medium... Also, the night/day before making this, bring your pumpkin in from outside. You don't want to start with a freezing cold pumpkin. It only makes the cooking time longer. Trust me.}

Directions:
Preheat oven to 350F.

Wash the pumpkin. Carve a lid from the top; remove it, and scoop out the seeds and "goop." Replace the lid, place the pumpkin on a cookie sheet (foil lined = easier cleanup), and pop it in the oven. Let it warm up and start to cook a bit while you get everything else ready. {You'll appreciate the head start; cooking a whole pumpkin takes a while...}

Prepare the veggies if you haven't already. Then in a large skillet over medium-high heat, cook the ground beef and onion until the meat is browned. (I like to add much of my seasoning here, too...) Add the garlic, celery and bell pepper. Cook until veggies are al dente {Can you use that term with veggies??}. Add the rice, and add (or add more of) the soy sauce, and salt/pepper. Taste as you go, and adjust seasonings accordingly. {Note: I like to season a little on the heavy side, since the pumpkin will be unseasoned and sharing.} Mix well and cook until warmed through.

Once the meat/veggies/rice mix is done, bring your pumpkin out of the oven for a minute. Fill the pumpkin with the innards mix. Replace the pumpkin's lid and return it to the oven. Bake at 350F for 1 hour, or until the pumpkin squash is tender {poke with a fork}. Also, the outside will start to "sag" a bit.

To serve, scoop out some pumpkin flesh along with the meat/veggies/rice mix and eat it all together, casserole style. Add a bit more soy sauce if desired. Enjoy!

Thursday, August 5, 2010

grilled pizza


I'd heard a bit about grilled pizza recently, but it wasn't until I saw this post on a blog I stalk called All Buttoned Up that I got "ballsy" enough to try it. We were absolutely unprepared and had to throw it all together in a minute {literally- since we had thrown the dough down on the grill before the toppings were even chopped}. But it turned out beautifully! The crust was deliciously crisp on the outside and chewy on the inside. The veggies were cooked but not too soft. The entire thing was heavenly... and oh-so-quick-and-easy. We will definitely be trying this again! Here's our general recipe in case you'd like to as well.


RECIPE: Grilled Pizza

Ingredients:
frozen pizza dough, thawed
pizza sauce (homemade or store-bought)
pepperoni
bell pepper
mushrooms
mozzerella cheese
freshly ground pepper
oregano

Directions:
Before you start, remove the upper warming rack thing from your grill. You just want to work with the main rack and not have something above to and in your way. {If you forget this step, have your hubby whip out some pliers to do it while it's piping hot. I hear this works, too...} Now fire up your grill and brush it clean.

Roll out pizza dough. Prepare your toppings how you'd like (grate cheese, chop/julienne vegetables, etc.). Brush {or spread with your fingers... } olive oil on both sides of the dough. Place the dough on the grill, reducing the heat to low. Let this side cook for just about a minute, then flip it. Add your toppings and close the lid. Grill for about 5 minutes or until your toppings are done and the crust is nicely charred. {Easy, right?} Remove from the grill and eat up! :)

Tuesday, July 20, 2010

tin foil dinners


Nothing says summer like camping, and nothing says camping like tin foil dinners. Although we didn't feel up to driving up the canyon and building a fire (especially since it was past dinnertime already), we used our math skills and figured that if A = B and B = C, then A = C (that's right, Mr. Kerr, I was paying attention). So for us, nothing says summer like tin foil dinners... a la grill! :) We did eat them on our front porch whilst sitting in camping chairs. That counts for something, right?

They're easy-peasy. Here's how you make 'em.


RECIPE: Tin Foil Dinners

Ingredients:
Tin foil dinners can be made with just about anything. The way we make them generally includes the following staples:

tin foil
ground beef
potatoes, thinly sliced
onions, chopped
carrots, chopped
seasoning* (a good amount)

*For seasoning, we generally use Lawry's seasoning salt and freshly ground pepper, but use what sounds good to you. Also, we generally use white/yellow onions, but this time all we had in the house were green ones. So we used those, and it was really tasty! Seriously, tin foil dinners are so easy and versatile. Almost anything goes.

Then we throw in whatever else sounds yummy. This time, we had leftover kabob-ingredients (cherry tomatoes, mushrooms, bell peppers) in the fridge, so we chopped them up and used them too.

I stop there, but Derek likes to add a dollop of Cream of Mushroom soup to his. Both ways are super yummy.

Directions:
Assembling the lil' guys is easy as well. Lay out a big piece of tin foil (or layer two, if you want to be on the safe side)- about 2 ft. long. Put your meat down in the center; flatten it into a patty of sorts; season it. Then pile on the veggies and whatever else you decided to add, seasoning that as well. Seal the foil up like a package- pulling the longer sides up and rolling them together first, then closing up the ends.

Toss those puppies on the grill, over med-high heat, for 20 minutes- flipping them half way (so 10 minutes on each side).

Serve warm and enjoy. Mmm... summertime!

PS. This is a great meal to let kids help with (which almost guarantees they'll eat it afterward). James assembled his own, grabbing a handful of this and a handful of that. I even let him help with the seasoning. Super fun, and healthy too!

What do YOU put in your tin foil dinners?

Tuesday, May 11, 2010

chicken parmesan

Last week, I made spaghetti. I had to leave for work right after dinner, so the process was a bit chaotic. I put green beans in the microwave and bread in the toaster (to make a quick version of garlic toast)... and I absolutely forgot about the bread. The next day, I discovered the toast. I decided I would have to try my hand at homemade breadcrumbs. The toast has been sitting on the counter since then. Needless to say, it was nice and stale. Perfect, really.

The idea for this recipe came from my sister-in-law's post (find it here). Mine is certainly not her healthy version, but BY GOLLY- it is delicious! Try it out. I think you'll like it.


RECIPE: Chicken Parmesan

Ingredients:
4 pieces whole wheat bread, toasted
1/2 c. shredded Parmesan cheese, divided
2 cloves garlic
1/2 tsp. salt
1/4 tsp. {ish?} freshly ground pepper
2 Tbsp. EVOO
1 1/2 lbs. chicken breast (or 3 small)
2 eggs
1/2 c. flour
1/2 c. Canola/vegetable oil {I think; I didn't measure.}
1 1/2 c. Mozzarella cheese
spaghetti noodles
spaghetti sauce (about 2 c.)
1 can green beans

Directions:
Preheat oven to 450F.

Pound the chicken breasts until they are about 1/2 inch thick. This step is important. It not only tenderizes the chicken but also thins it out so that it cooks uniformly... and doesn't burn on the outside before it's cooked through. {I like to do this in a gallon-sized Ziploc bag... using a rubber mallet.}

*Note: I had two massive chicken boobies that I cut into four pieces. I only ended up using three since I didn't quite have enough breadcrumbs. Hence the three breasts recommendation.

{Before}
{After}
Using a food processor, pulse the toast, 1/4 c. Parmesan cheese, garlic, S&P and EVOO - in that order- until breadcrumbs form.
Prepare your assembly line of bread-crumbing ingredients. Dump the flour onto a plate. Beat two eggs and a splash of water in a bowl of some sort. Dump your super-savory breadcrumbs onto another plate.
{Like so}
Heat your Canola/vegetable oil in a large skillet over medium to medium-high heat. Meanwhile, dredge each chicken breast in flour, shake off excess; slosh around in egg mixture, coating fully; then press into breadcrumbs, pressing crumbs into chicken until absolutely coated. Fry the prepared chicken in oil (again, in a large skillet over med to med-high heat) for about 3-4 minutes per side, or until golden and fabulous {see below}.

Note: Get your water boiling now for your pasta. Don't forget to salt the water.
Place the fried chicken on a cooling rack on top of a cookie sheet {or stone, if that's what you had out before you thought of the cooling rack idea}. This will help keep the breadcrumbs crispy later on.
Top liberally with Mozzarella cheese and lightly with Parmesan cheese. Throw some pepper up on there if you feel the need.
Bake at 450F for about 10 minutes, or until the cheese is bubbly and browned.

Note: The bake time for the chicken perfectly coincides with the spaghetti cooking time. So as soon as you throw the birdies in the oven, start cooking your pasta. I'm a horrid judge of pasta quantities, so use your own {better} judgement. Cook according to package instructions.

Also, open up a can of green beans. Drain 'em a bit, then dump 'em in a bowl. Microwave for dos minutos. Easy-peasy.

Oh, and warm up some spaghetti sauce. I did it on the stove; you could also nuke it. Whatev. But you do want it warm... so take care of that.

Once your 10 minutes are up, the entire meal should be ready to assemble. Grab a plate and dish up some spaghetti noodles. Top with sauce. Top that with your oh-so-yummy chicken. And serve with a side of green beans.

Mmm... amazing!

Friday, April 2, 2010

honey-mustard pork chops

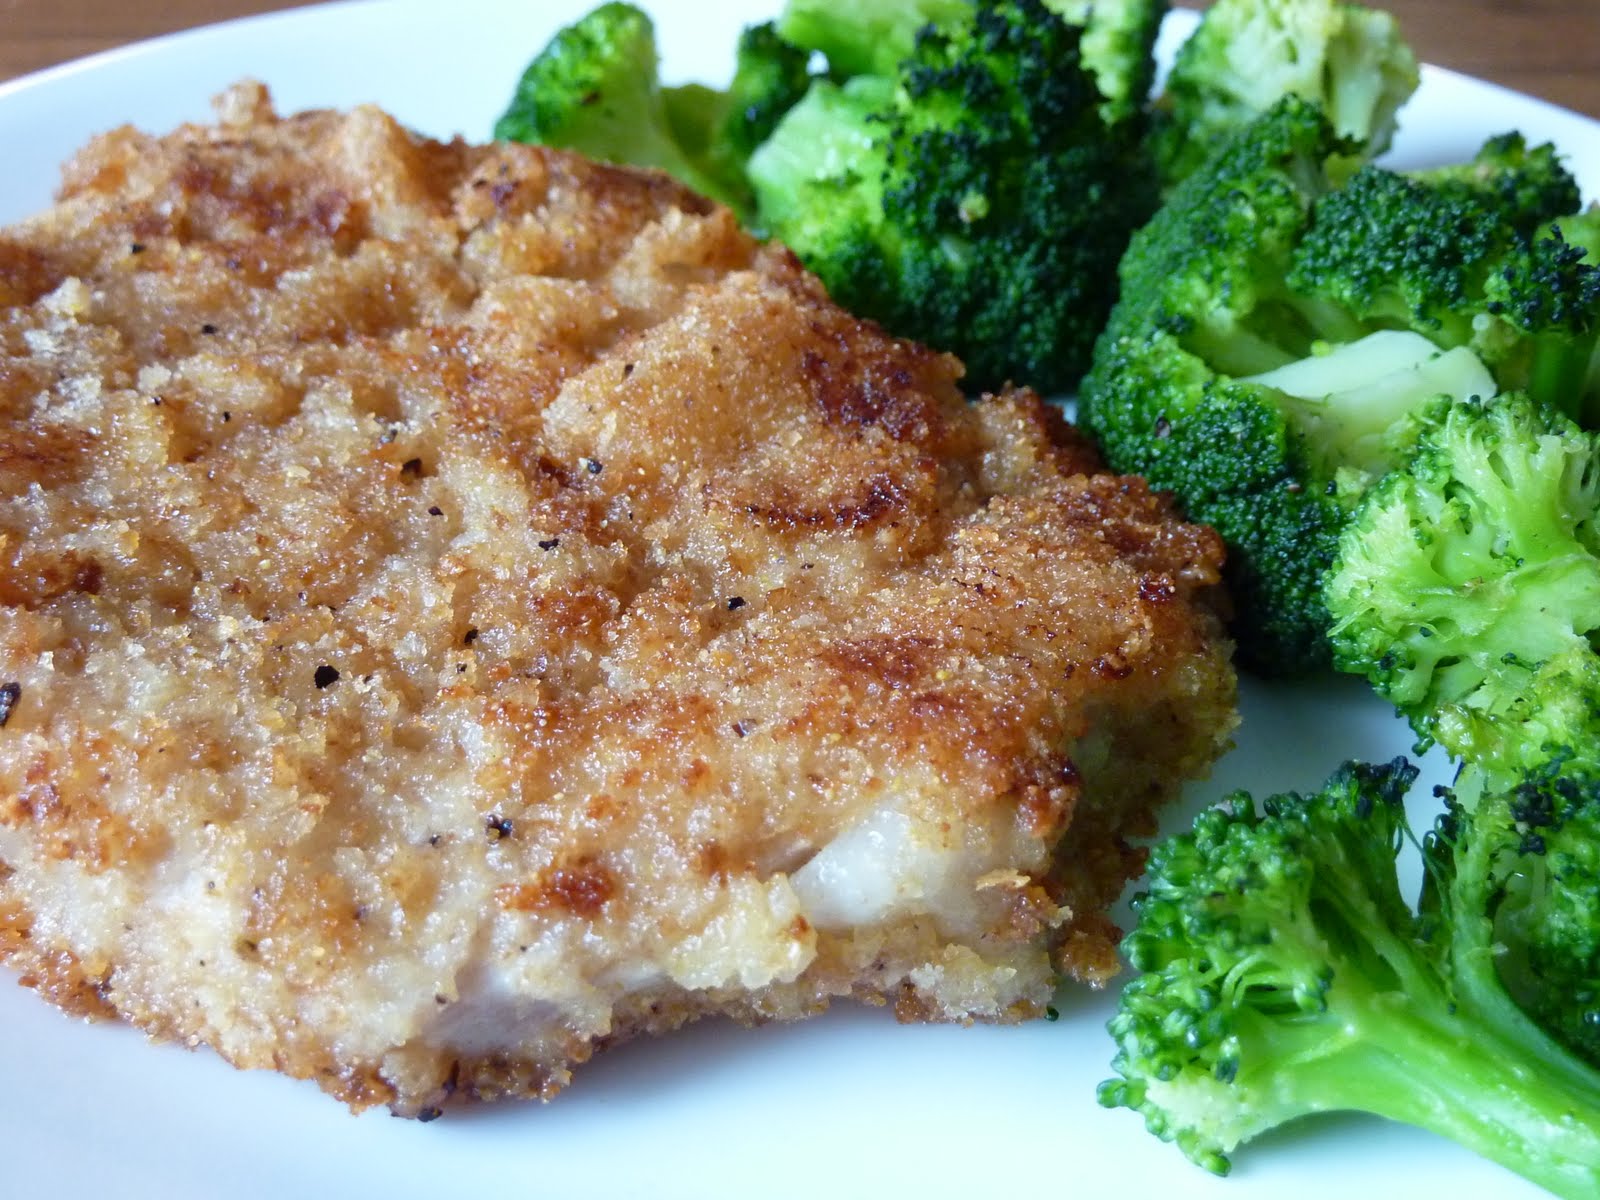
When we had our little Jolie, several people from our ward {church} brought us dinner. It was the kindest thing... and not too shabby in the tasty department. :) One couple in particular brought us something that absolutely Hit.The.Spot. They were breaded chicken tenders, but they had a kick of unexpected flavor that I couldn't identify but LOVED. Anyway, eventually I called them and asked for the recipe. It was an "equal parts of this and that and a splash of this other" sort of recipe- the kind I love, btw. And it worked pretty well. Somehow we couldn't get the chicken as tender nor the frying as down pat, but still- delish.

Then last night Derek and I were searching for a dinner idea and came across some pork loin chops in the freezer. I rarely cook with pork, mostly because I am not sure what to do with it, but I thought I'd give it a try. I searched through several of the foodie blogs I stalk, checked on allrecipes.com, and looked through Rachael Ray's recipes. Rach {yep, we're that close} had a similar-to-the-Welling's recipe but with pork loin chops. I stole ideas from these two recipes and made up my own rendition. The results were pretty fabulous, if I do say so myself. Super tender, super tasty, and not too difficult to make. Feel free to try it with chicken breast or tenders, too. It's yum either way. Mmm... now where are those leftovers?

{Note: We didn't have thin-cut loin chops; we just had regular ones. The problem with regular ones is they're thick and require longer cooking- which could result in burned breadcrumbs or over-cooked-and-therefore-tough pork. We cut ours in half to make them thinner. It worked super great! But if you're buying the chops after seeing this recipe, ask your butcher for thin-cut boneless loin chops.}


RECIPE: Honey-Mustard Pork Chops

Ingredients:
4 thin-cut boneless pork loin chops
1/3 c. honey
1/3 c. dijon mustard
3 tsp. vinegar
1 c. breadcrumbs
1 tsp. freshly ground pepper
1/2 tsp. salt
4-ish Tbsp. canola/vegetable oil

Directions:
First, tenderize the loin chops. To do this, place the chops in a ziplock bag, press out extra air and seal. Then get a mallet and pound. Pound them until they are about 1cm thick.

In a small-medium bowl {I use a square tupperware dish}, mix honey, dijon mustard and vinegar until combined. On a large plate, dump out breadcrumbs and mix in the S&P. Dip each tenderized pork chop in the honey-mustard mixture, then in the breadcrumbs, coating well.

Heat the oil in a large frying pan over medium-heat. (You'll know the oil's ready when a wooden spoon pressed to the bottom results in little bubbles coming up around it.) Cook the now-breaded pork loin chops for 3-4 minutes on each side, or until they are golden brown.

Note: If you need to keep the chops warm while you wait for your side, etc., put them on a wire rack inside of a rimmed cookie sheet and into a 300F oven. This will keep them crisp.

Serve warm and enjoy!